How to Recover Data from Failed Maxtor Hard Drive?
Maxtor was the third world wide hard drive manufacturing organization. In year 2006, it has been purchased Seagate. Maxtor offers very high data storage capability which enables people to store their precious data in these hard drives. Maxtor hard drives are very easy to use and having a large data storage capacity. Due to the advanced features of Maxtor hard drives, people are using these drives and also make sure that the data store on a Maxtor drive is safe and secure. Besides these features, Maxtor drives are not free from problems.
People are also facing various issues from their Maxtor hard drive such as failure of hard drive, inaccessibility, damaging, not recognizing, etc. After occurring hard drive failure issue, data present in the drive become inaccessible. So to get back Maxtor hard drive data, people can take the help of Maxtor Data Recovery application because there is no other manual way to perform Maxtor hard drive failure recovery. It is one of the more efficient and advanced recovery program developed by expert IT professionals to recover each bit of data from Maxtor hard drive as it was before drive failure. This utility is also capable to restore data from damaged Maxtor hard drive easily.
Scenarios leading to the severe corruption of Maxtor hard drive that inturn results in the failure of the drive:
File System Corruption: File system is the structure used by operating system for keeping, retrieving and managing the information stored in hard drive. It this file system gets damaged due to any known or unknown reasons, then the drive will be fail to read this drive.
Virus Infection: Viruses are the small system program which has capability to damage the drive and the information store in it. If Maxtor hard drive gets infected with these harmful viruses, then it makes the entire drive failure to read.
Bad Sectors: Bad sectors are the damaged part of hard drive platter and the data store in these platters become inaccessible. If the number of bad sectors gets increased, then it will be a cause behind hard drive failure.
Maxtor Data Recovery Software to Recover Data from Failed Maxtor Hard Drive:
Whatever can be a cause behind drive failure, Maxtor hard drive failure recovery can be easily achieved by using Maxtor Data Recovery software. This app is enough capable to restore data from Maxtor hard drive which can be failed to read, unreachable, damaged or corrupted. This ready to use utility can utilize to perform data recovery from formatted hard drive in simple few mouse clicks. People can take the help of this utility to recover data from failed Maxtor hard drive which supports any file system, including FAT 16, NTFS5, FAT 32 and HFS+. This Maxtor Data Recovery app is compatible with all the latest versions of Mac and Windows system, such as Leopard, Win 8, Lion, Win 7, Yosemite, Win XP, Mavericks, Win Vista, etc.
With the help of this ready to use tool, people can recover data from various types of hard drives like SATA, PATA, SCSI and IDE. Its preview option allows people to take the preview of restored data before keeping them to desired location on hard drive. Not only from Maxtor hard drive failure recovery but also it supports data recovery from shared storage device very easily. This program allows users to recover various types of files from Maxtor hard drive, including audio, text file, videos, documents, pictures, software’s, etc.
Steps to recover data from failed Maxtor hard drive:
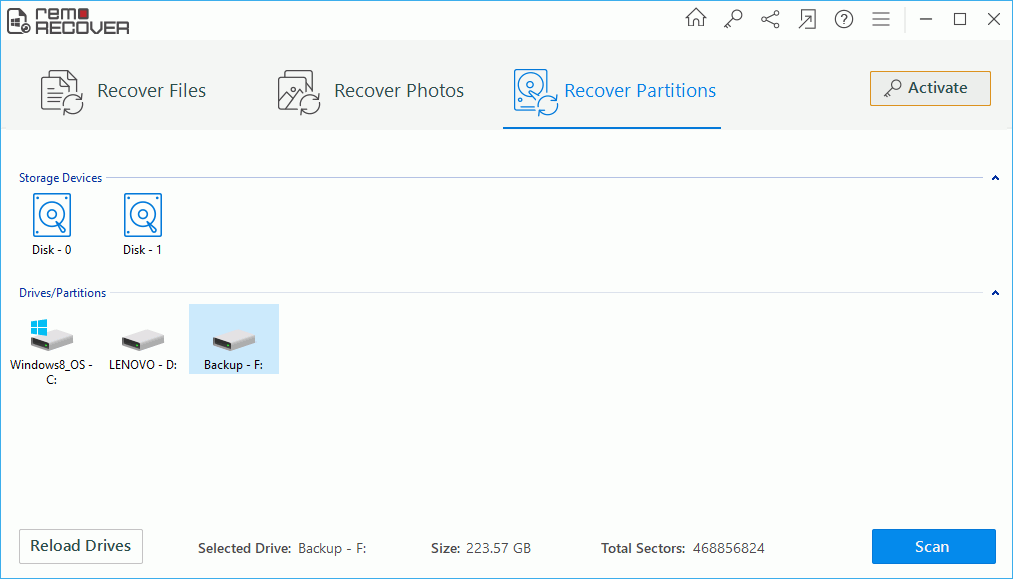
Step 1: Download and install the free version of Maxtor Data Recovery tool on your PC. After successful installation, launch the software. In the Main Screen, select “Recover Partitions” option. Then, the tool shows all the logical and physical disk drives available in the system. Choose the appropriate physical disk and click "Scan" option
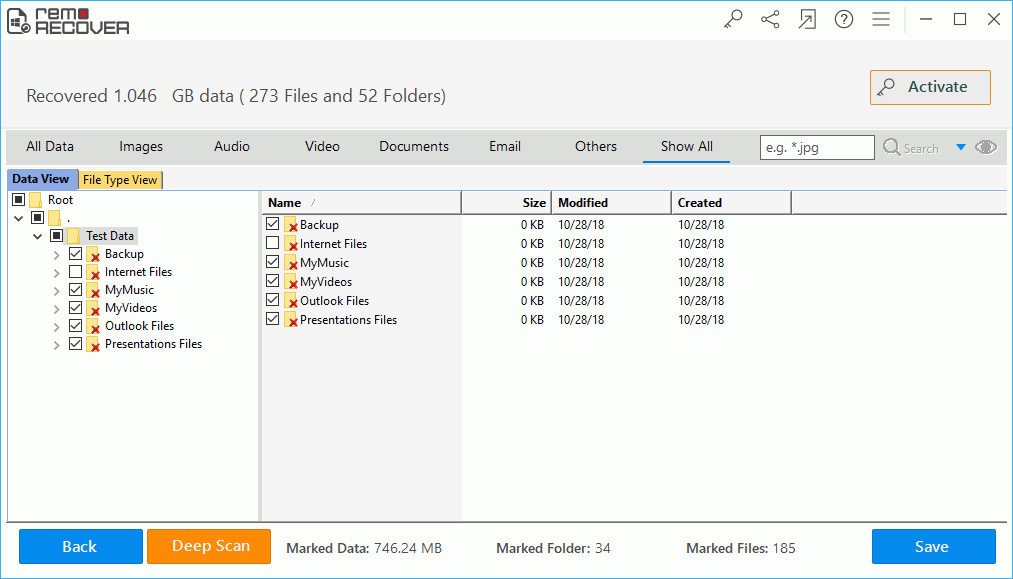
Step 2: Now, the software scans the selected partition to regain it's files back. Wait for the scanning to get complete.

Step 3: Upon the completion of scanning process, a list of recovered files are displayed. You can view the recovered files in Data View, and File Type View.
Step 4: Finally, at the end of recovery process, youc an preview the recoverable files by right clicking on the file and selecting Preview from the displayed options.

Step 5: At last, if you are satisfied with the tool, then activate the license key of the tool and select the destination drive to save the recovered files.
